


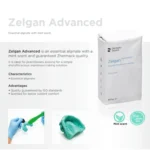


Characteristic
- Essential Alginate
Advantages
- Quality guareented by ISO standards
- Scented for better patient comfort
Specification
- Mixing Time: 60 secs
- Working Time: 30 secs
- Setting Time: 2 min 30 secs
- Time in Mouth: 60 secs
Packaging
- 1 x Zelgan Advanced (453 gms)
Direction to Use
Preparation:
- Ensure that you have all the necessary materials ready, including the alginate powder, water, measuring scoop, mixing bowl, spatula, and appropriate trays.
- Clean and dry the trays that will be used for the impressions.
- If desired, apply alginate tray adhesive materials to the trays to enhance the adhesion of the impression material.
Mixing:
- Measure the appropriate amount of alginate powder using the provided measuring scoop. Follow the manufacturer's instructions for the recommended powder-to-water ratio.
- Fill the mixing bowl with the required amount of clean water at the recommended temperature. The temperature may vary depending on the specific instructions provided by the manufacturer.
- Slowly add the alginate powder to the water while continuously stirring with the spatula. Mix thoroughly to ensure a homogenous and smooth consistency.
- Continue mixing for the recommended time specified by the manufacturer to activate the alginate material properly.
- Ensure that the powder is completely incorporated and free of lumps. The special formulation of the powder eliminates dust during mixing.
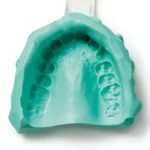
Loading the tray:
- Once the alginate material is mixed, quickly load it onto the prepared tray. Fill the tray evenly and smoothly to avoid any air bubbles or voids.
- Place the loaded tray into the patient's mouth, ensuring proper alignment with the dental arches.
- Instruct the patient to bite down gently and maintain the position until the impression material sets.
Setting and removal:
- Allow the impression material to set according to the manufacturer's instructions. The setting time will depend on the specific formulation of the alginate material.
- Once the material has set, gently remove the tray from the patient's mouth. Take care to maintain the integrity of the impression and avoid any distortion or damage.
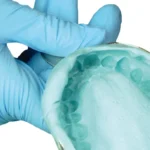
- Inspection and storage:
- Inspect the dental impression for accuracy and quality, ensuring that it captures the anatomical features of the dental arches.
- Rinse the impression under running water to remove any debris or excess material.
- Allow the impression to air dry completely before storing or sending it to the dental laboratory.

Mr. Mackay –
Or else, an alternative route: set checkpoints, networks, processes, junctions between content and layout. Depending on the state of affairs it may be fine to concentrate either on design or content, reversing gears when needed.